
How students can find their group
If you have a spreadsheet of students groups then here’s a way you can upload them to Moodle and use the Group Choice activity to allow them to see which groups they are in.
While there are several ways to automatically group your students, these are either based on the programme code/year, or are allocated randomly. Manually creating groups can be time consuming in Moodle but if you have used a spreadsheet to allocate students to their groups, this can be imported into Moodle to create the groups. Then, by using the Group Choice activity which has ‘closed’, students can find out which group they are in plus any relevant details you choose to provide.
Create group spreadsheet
1. Create the group spreadsheet
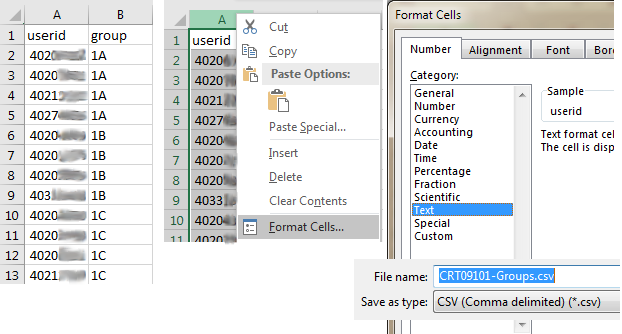
The spreadsheet needs only two columns with the headers userid and group with the matriculation numbers and corresponding groups listed underneath (a description column is optional). It’s a good idea to format the userid column as ‘text’ in case there are any matric numbers that begin with a 0 (which would be removed in a number formatted column). The spreadsheet must be saved in a CSV format so click yes at the formatting prompt and ignore any further complaints from Excel.
Upload the CSV file
2. Upload the CSV file
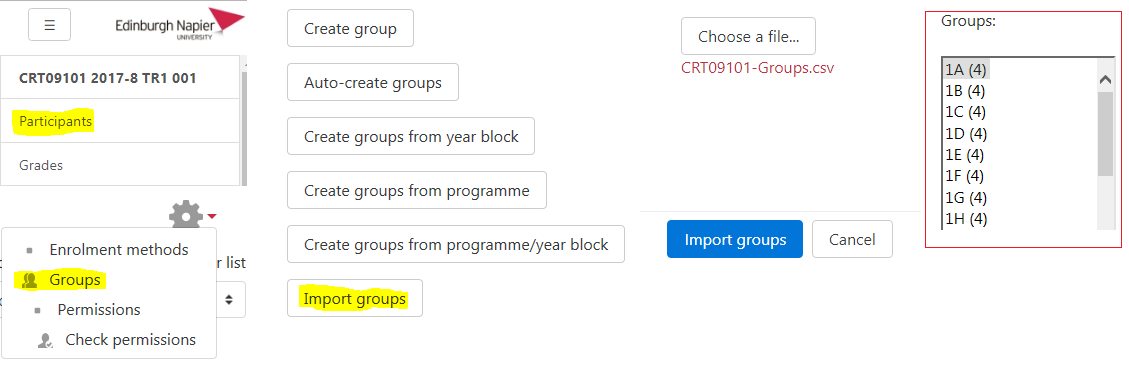
Expand the side panel and click the Participants link. Click the cog icon and select Groups, and then click Import groups. Upload the CSV file and as long as there are no formatting errors in the file, the groups will be created and the students allocated accordingly. Note that all students in the CSV file must be enrolled in the course. Moodle will try and create the group listed in each row so there will be messages saying ‘group already exists’ once a group is created for the first time. You can check the groups from the Overview tab which will also list he students who are not in a group.
Group Choice activity
3. Add the Group Choice activity
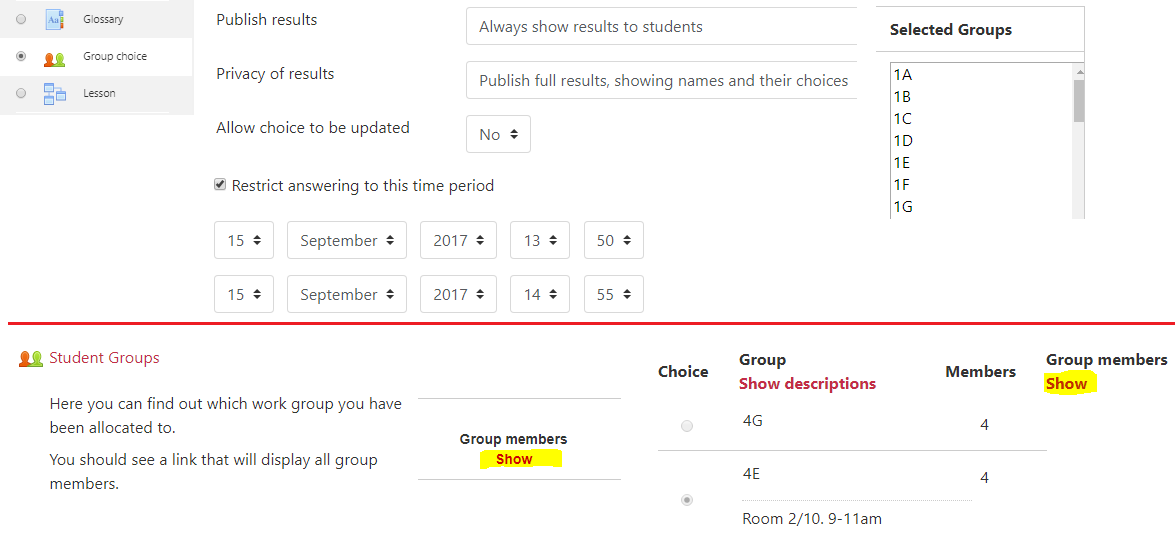
Add this activity and enter appropriate information in the Description box. Enable the settings so that the results are published only after the choice is closed, and that choices cannot be updated. Set the answering time period to some point in the past. When the students click the show members then all group’s members are displayed (not just their group), and similarly for the group descriptions.