Sharing videos
Using videos from a variety of sources can really bring your courses to life – here are a few of the ways that we can do that in Moodle. Full details are available in this guide to sharing videos in Moodle.
Linking & embedding videos
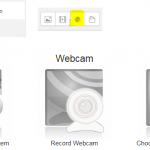
Use the Online Video activity to add a video link to your course homepage, or use the online video icon in the HTML editor to embed a video in a Moodle Page or Book. This is preferable to embedding videos on the course home page as it reduces page scrolling and page loading.
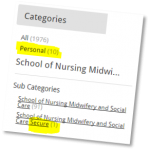
Both methods allow you to upload a video to the online video server, and to search for an existing video in your personal, secure or public categories.
View the guide to sharing online server videos in Moodle
YouTube or Vimeo
To embed a video from YouTube or  Vimeo you only need to add the URL using the link icon in the HTML editor…Moodle’s multimedia filter will do the rest and embed the video within your Page or Book.
Tip: reduce scrolling and load times by embedding videos in a Page or Book
MEDIALecture
 MEDIALecture makes it easy to record your computer’s screen activity and also your voice using a microphone or webcam.
There are editing options for the clip to be trimmed, chopped, and titles and credits can be added. The recording is immediately send it to your personal category of the Online Video Server without having to manually upload any video files.
Then move the video into a public or secure category, or use the Moodle plugin to restrict access to your students. Further details are available in this guide to changing video categories.
The University Online Video Server
Always upload your videos to the online video server which is a streaming server (like YouTube) making it easy for students to view videos on a range of devices. Videos can be stored and displayed with 3 different security levels: 
- Public (open access),
- Secure (requires a login to the video server)
- Personal (private to you or to your Moodle course via the plugin).

